Create a segment
Open Segments and press New segment.
The window opens on its first step, Details.
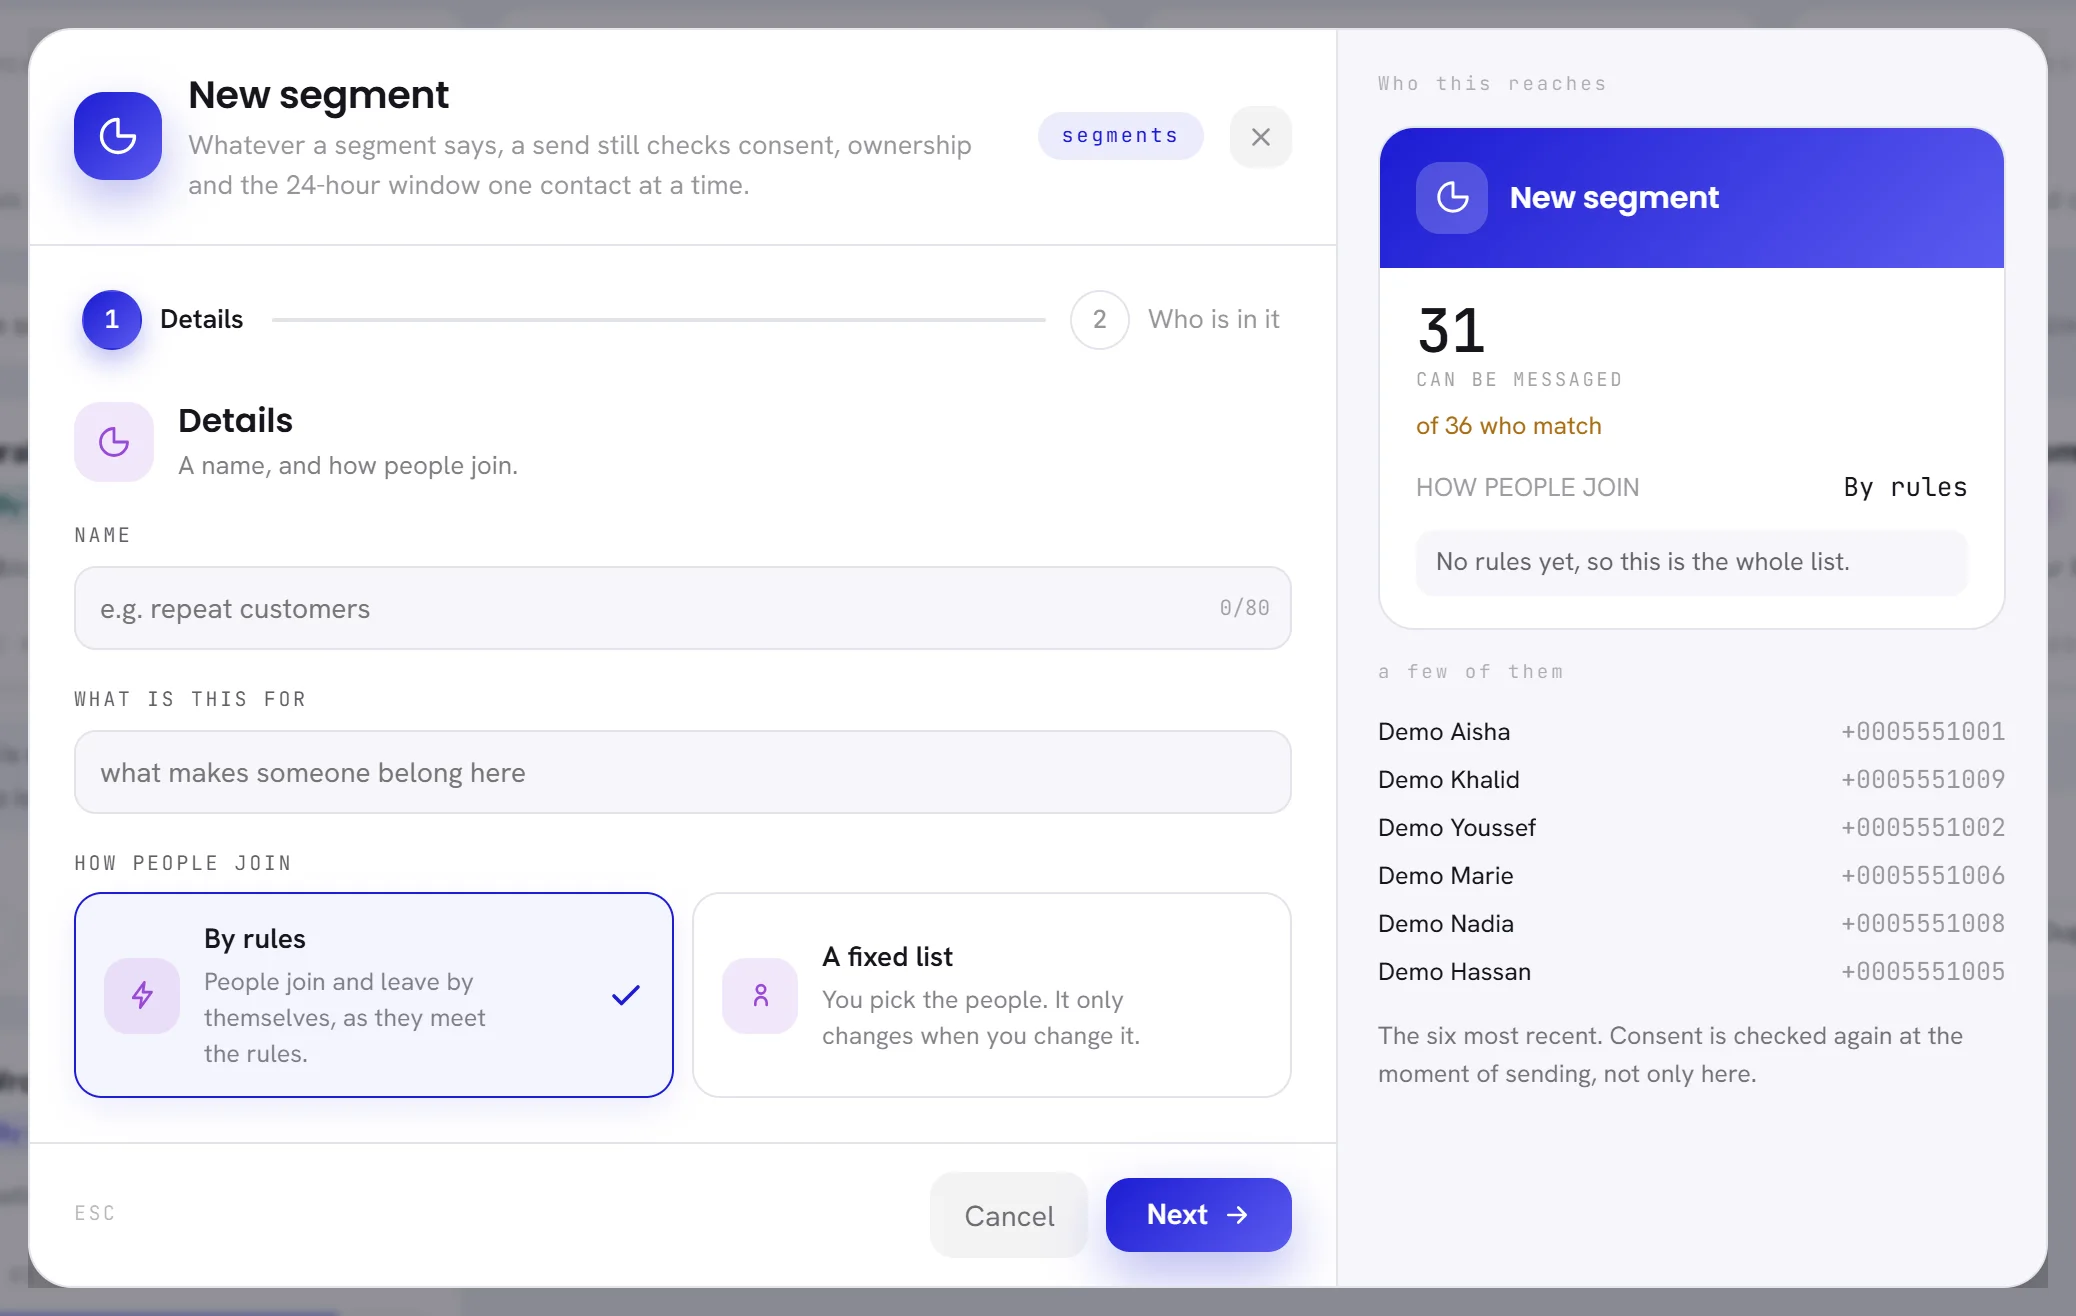
Under Name, type a name you will recognise when you choose the segment in a campaign.
Up to 80 characters. Two segments cannot have the same name.
Under What is this for, say what makes a contact belong here.
Optional, up to 200 characters. It is shown on the segment’s card.
Under How people join, choose By rules or A fixed list.
By rules: contacts join and leave by themselves as they meet the rules. A fixed list: you pick the contacts, and the list only changes when you change it.
Press Next.
The second step, Who is in it, is where you write the rules or tick the contacts. Both are explained below.
Press Create segment.
The window closes and the new segment’s card is outlined in the list.
Back returns to the first step without losing anything. Cancel, the × and the Esc key close the window without creating the segment.
Write the rules
For a segment By rules, the second step lists what a rule can ask under What do they have in common?
Click a card, for example A tag.
A rule appears above the cards, with the cursor in its box.
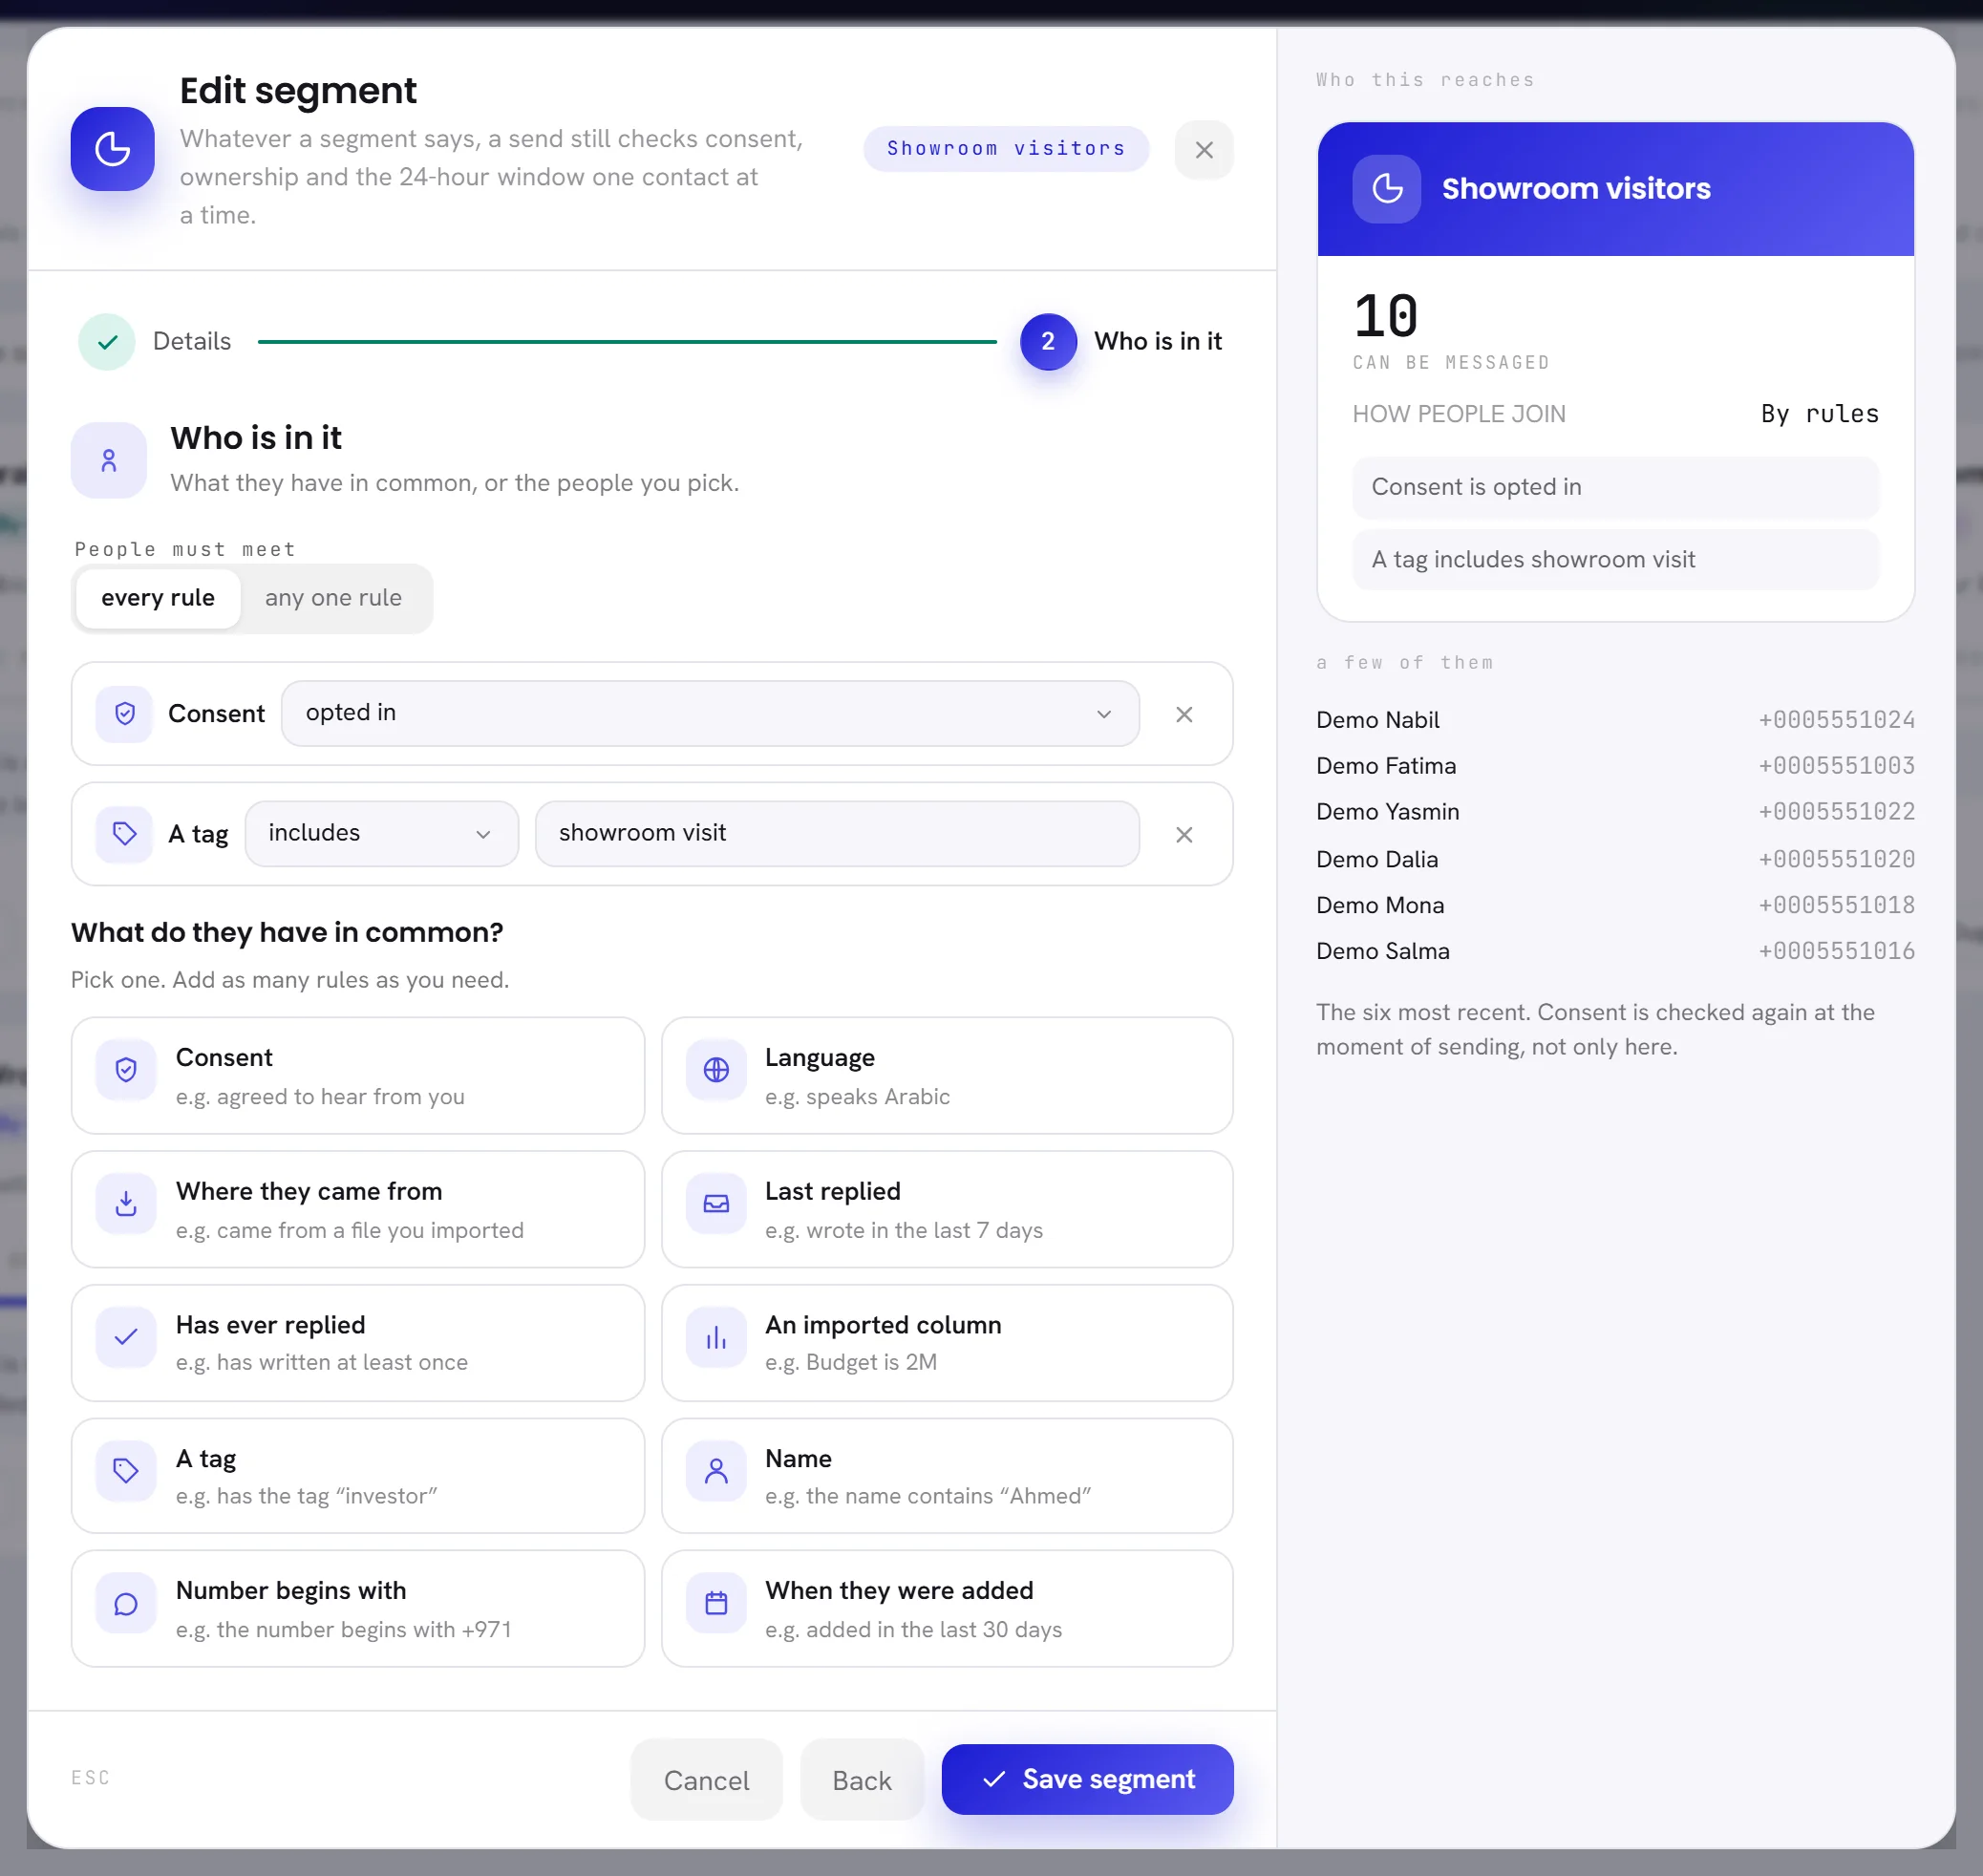
Complete the rule.
Choose the comparison where the rule has one, then type or choose the value.
Add as many rules as you need, up to 12.
The × at the end of a rule removes it.
With two rules or more, choose under People must meet.
every rule: a contact must meet them all. any one rule: meeting one is enough.
| Rule | Comparison | Value |
|---|---|---|
| Consent | None | opted in, opted out or never asked. |
| Language | is, is not | The contact’s language: English, Arabic or French. |
| Where they came from | is, is not | The contact’s source. Pick from the suggestions: Manually added, File import, WhatsApp message, WhatsApp history, or any other source your contacts carry. |
| Last replied | in the last, not in the last | A number of days, from 1 to 3650. “Replied” means the contact wrote to you. not in the last also matches contacts who never wrote. |
| Has ever replied | None | yes or no. |
| An imported column | is, contains, is present | First the column name, as it was in the file you imported, then the value. is present needs no value. |
| A tag | includes, does not include | One tag, written exactly as it is on your contacts. |
| Name | contains | Part of the contact’s name. |
| Number begins with | None | The first characters of the number, for example +971. |
| When they were added | in the last, not in the last | A number of days. |
- With no rule at all, the window says No rules yet, so this is the whole list. and the segment holds every contact.
- A tag must match exactly, and tags are kept in lower case:
investordoes not findInvestororex-investor. Pick the tag from the suggestions as you type. - A source you pick from the suggestions shows as its short code, in the box and on the card:
importfor File import,by handfor Manually added. - A value holds up to 80 characters, a column name up to 60.
Watch the count as you build
The right side of the window, Who this reaches, follows what you do. It is counted again a moment after every change, so a rule that matches nobody shows as 0 before you save it.
| On the screen | What it does |
|---|---|
| Can be messaged | The large number: the contacts who meet the rules and can be sent a campaign today. |
| of 36 who match | Shown when more contacts meet the rules than can be messaged: everybody who matches, consent aside. |
| How people join | The kind you chose on the first step. |
| a few of them | The six most recent contacts the segment reaches, so you can see whether the rules say what you meant. |
Between the two, the window spells out your rules in words, such as “A tag includes showroom visit”.
Pick the contacts yourself
For A fixed list, the second step is a list of your contacts to tick.
Tick each contact who belongs in the segment.
The counter above the list, 5 pinned, follows as you tick, and so does the count on the right.
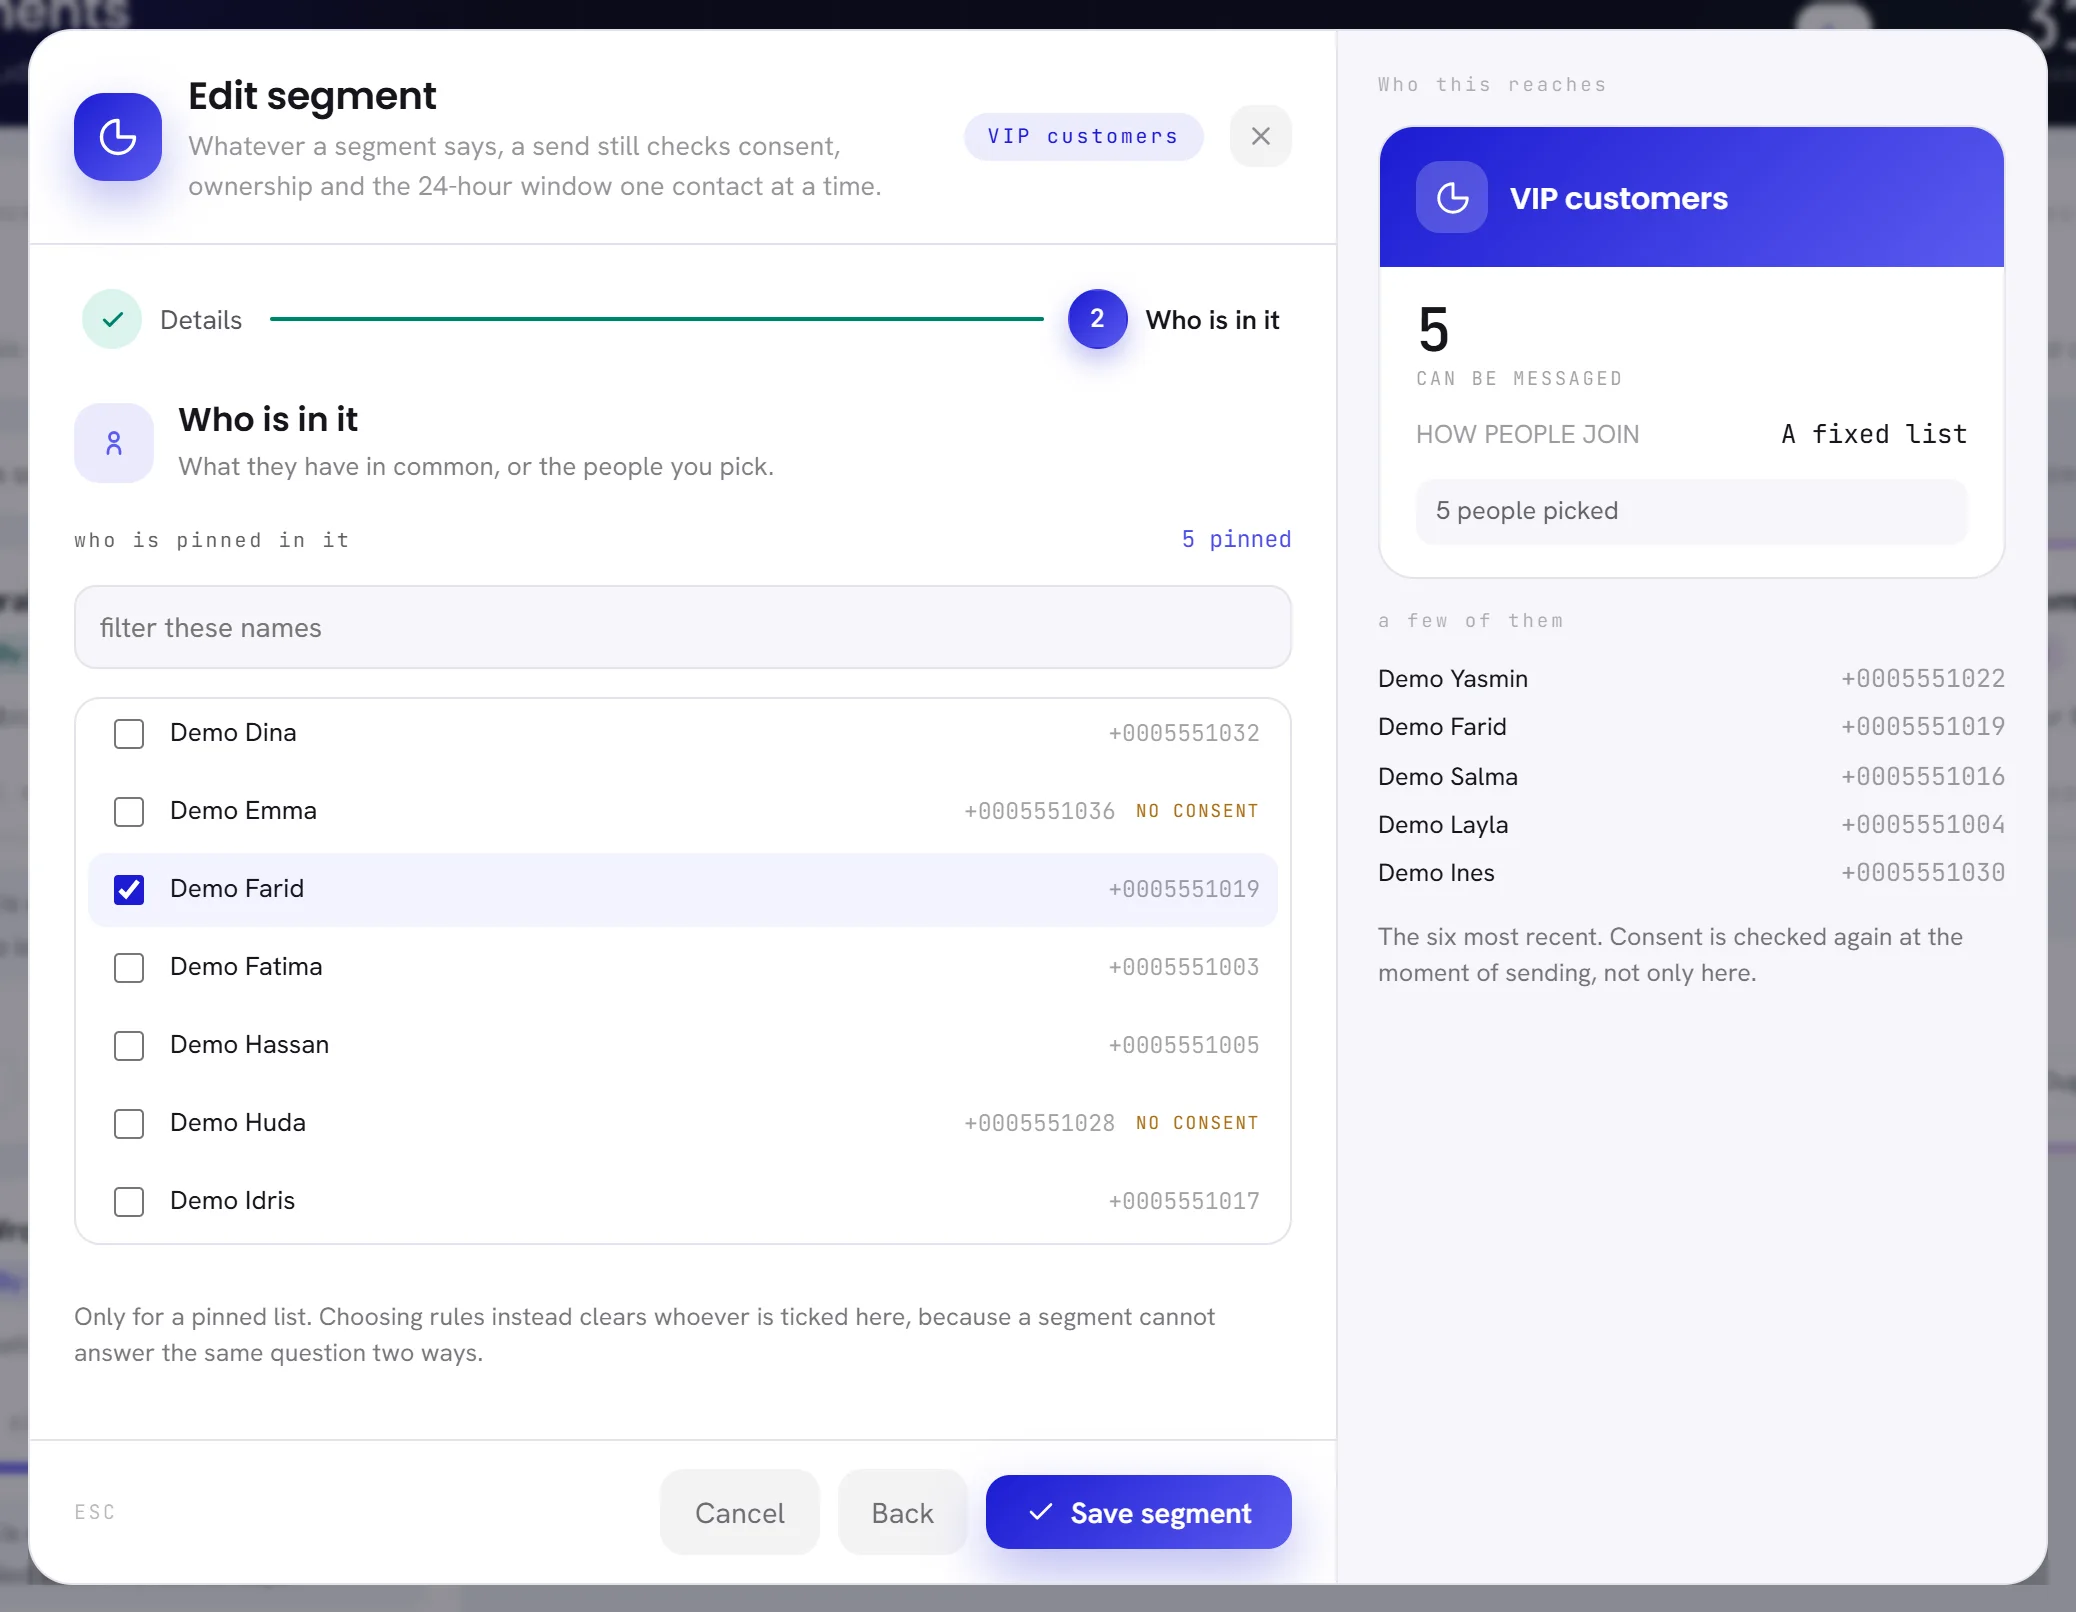
To find somebody, type in filter these names.
The list narrows to the names and numbers that match. Contacts you already ticked stay in view.
Press Create segment.
- No consent beside a contact means a campaign cannot send to them. You can still tick them: they count from the day their consent is recorded.
- A contact with no name is listed as no name, with their number.
- The list offers your first 200 contacts, in order of name. With more contacts than that, a note says so. For a longer list, give those contacts a tag and build the segment By rules on that tag.
- A fixed list fixes who is in it, not their consent. A contact who opts out leaves the count the same day.
Edit, duplicate or delete a segment
Edit. On the segment’s card, press Edit. The window Edit segment opens with the segment’s answers.
- Both steps are open at once: click Details or Who is in it at the top to go straight to either.
- Save segment is there on both steps, so one small change does not mean walking through the other step.
- Changing How people join keeps one half only. A segment turned into a fixed list loses its rules, and a fixed list turned into rules loses its ticked contacts.
- A campaign already launched keeps the contacts it took. A campaign you launch later uses the segment as it is then.
Duplicate. Press Duplicate on the card. The copy appears in the list, named like the original with “copy” at the end, and carries the same description and rules.
Delete. Press the bin on the card.
The app asks Delete this segment? Campaigns already sent are unaffected.
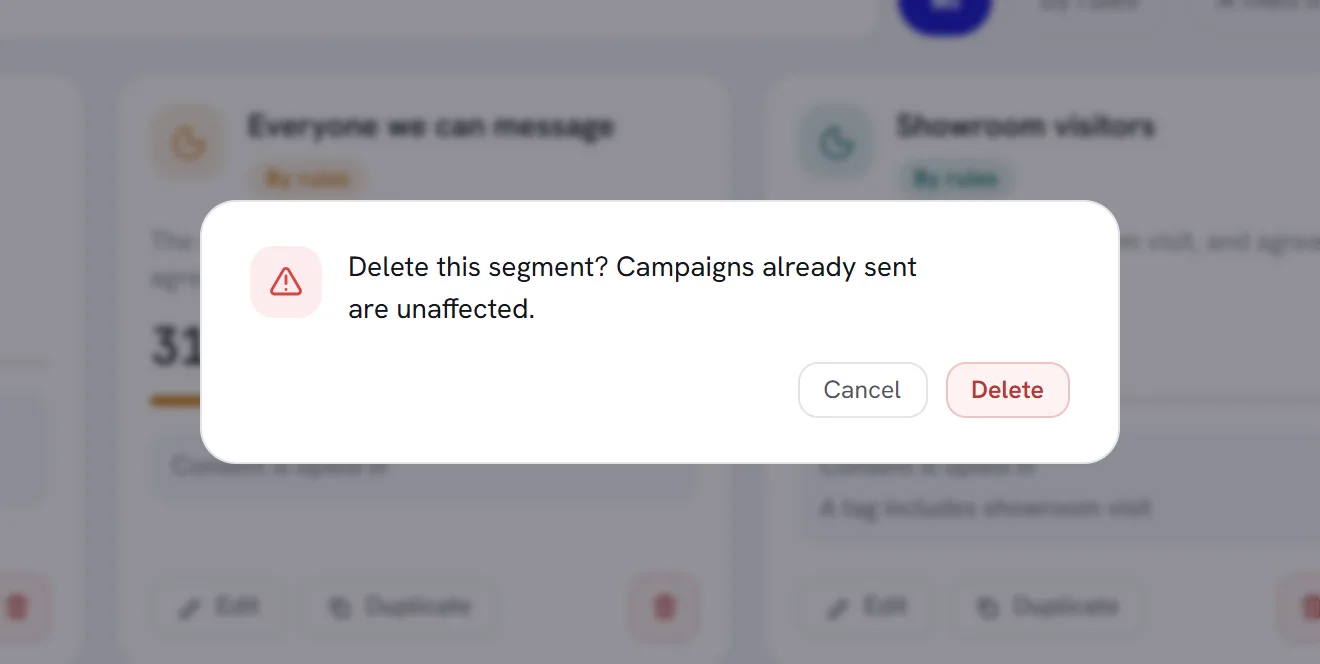
Press Delete.
The segment is gone. Its contacts are not touched. A campaign that used it and has not been launched yet has no audience until you choose another segment.
Why a campaign can send to fewer contacts
The count is right at the moment you look at it. A campaign takes the contacts who can be messaged at the moment you launch it, and that list does not change afterwards, while the segment goes on changing. On top of that:
- Contacts who meet the rules but gave no consent, or opted out, are never counted and never sent to. The card says how many there are.
- Consent is checked again just before each message. A contact who opts out while a campaign is going out is not sent to.
- A campaign with a marketing template skips contacts who turned off marketing messages from your business in WhatsApp.
- A contact with no value for one of the template’s blanks, for example no name, is skipped.
How consent is recorded, and what an opt-out does, is in Consent and opt-outs. What a campaign did with each contact is in Campaign results.
Good to know
- If a name is already used by another segment, the window opens again with the reason at the top. Change the name and save again: nothing you typed is lost.
- On the first step, pressing Enter in a box moves to the second. On the second step it creates or saves the segment, like the button.
- Nothing is saved until you press Create segment or Save segment.