Before you start
Making an agent takes a minute: a name, what it is for, and what it may save about a customer. It starts as a draft and answers nobody until you put it live, so you can take your time with the rest.
- You need access to AI Agent: admins and managers have it.
- You do not need a WhatsApp number to make an agent or to try it. You need one connected to put it live.
Create the agent
Open AI Agent and choose New agent.
The form Create an AI agent opens over the list.
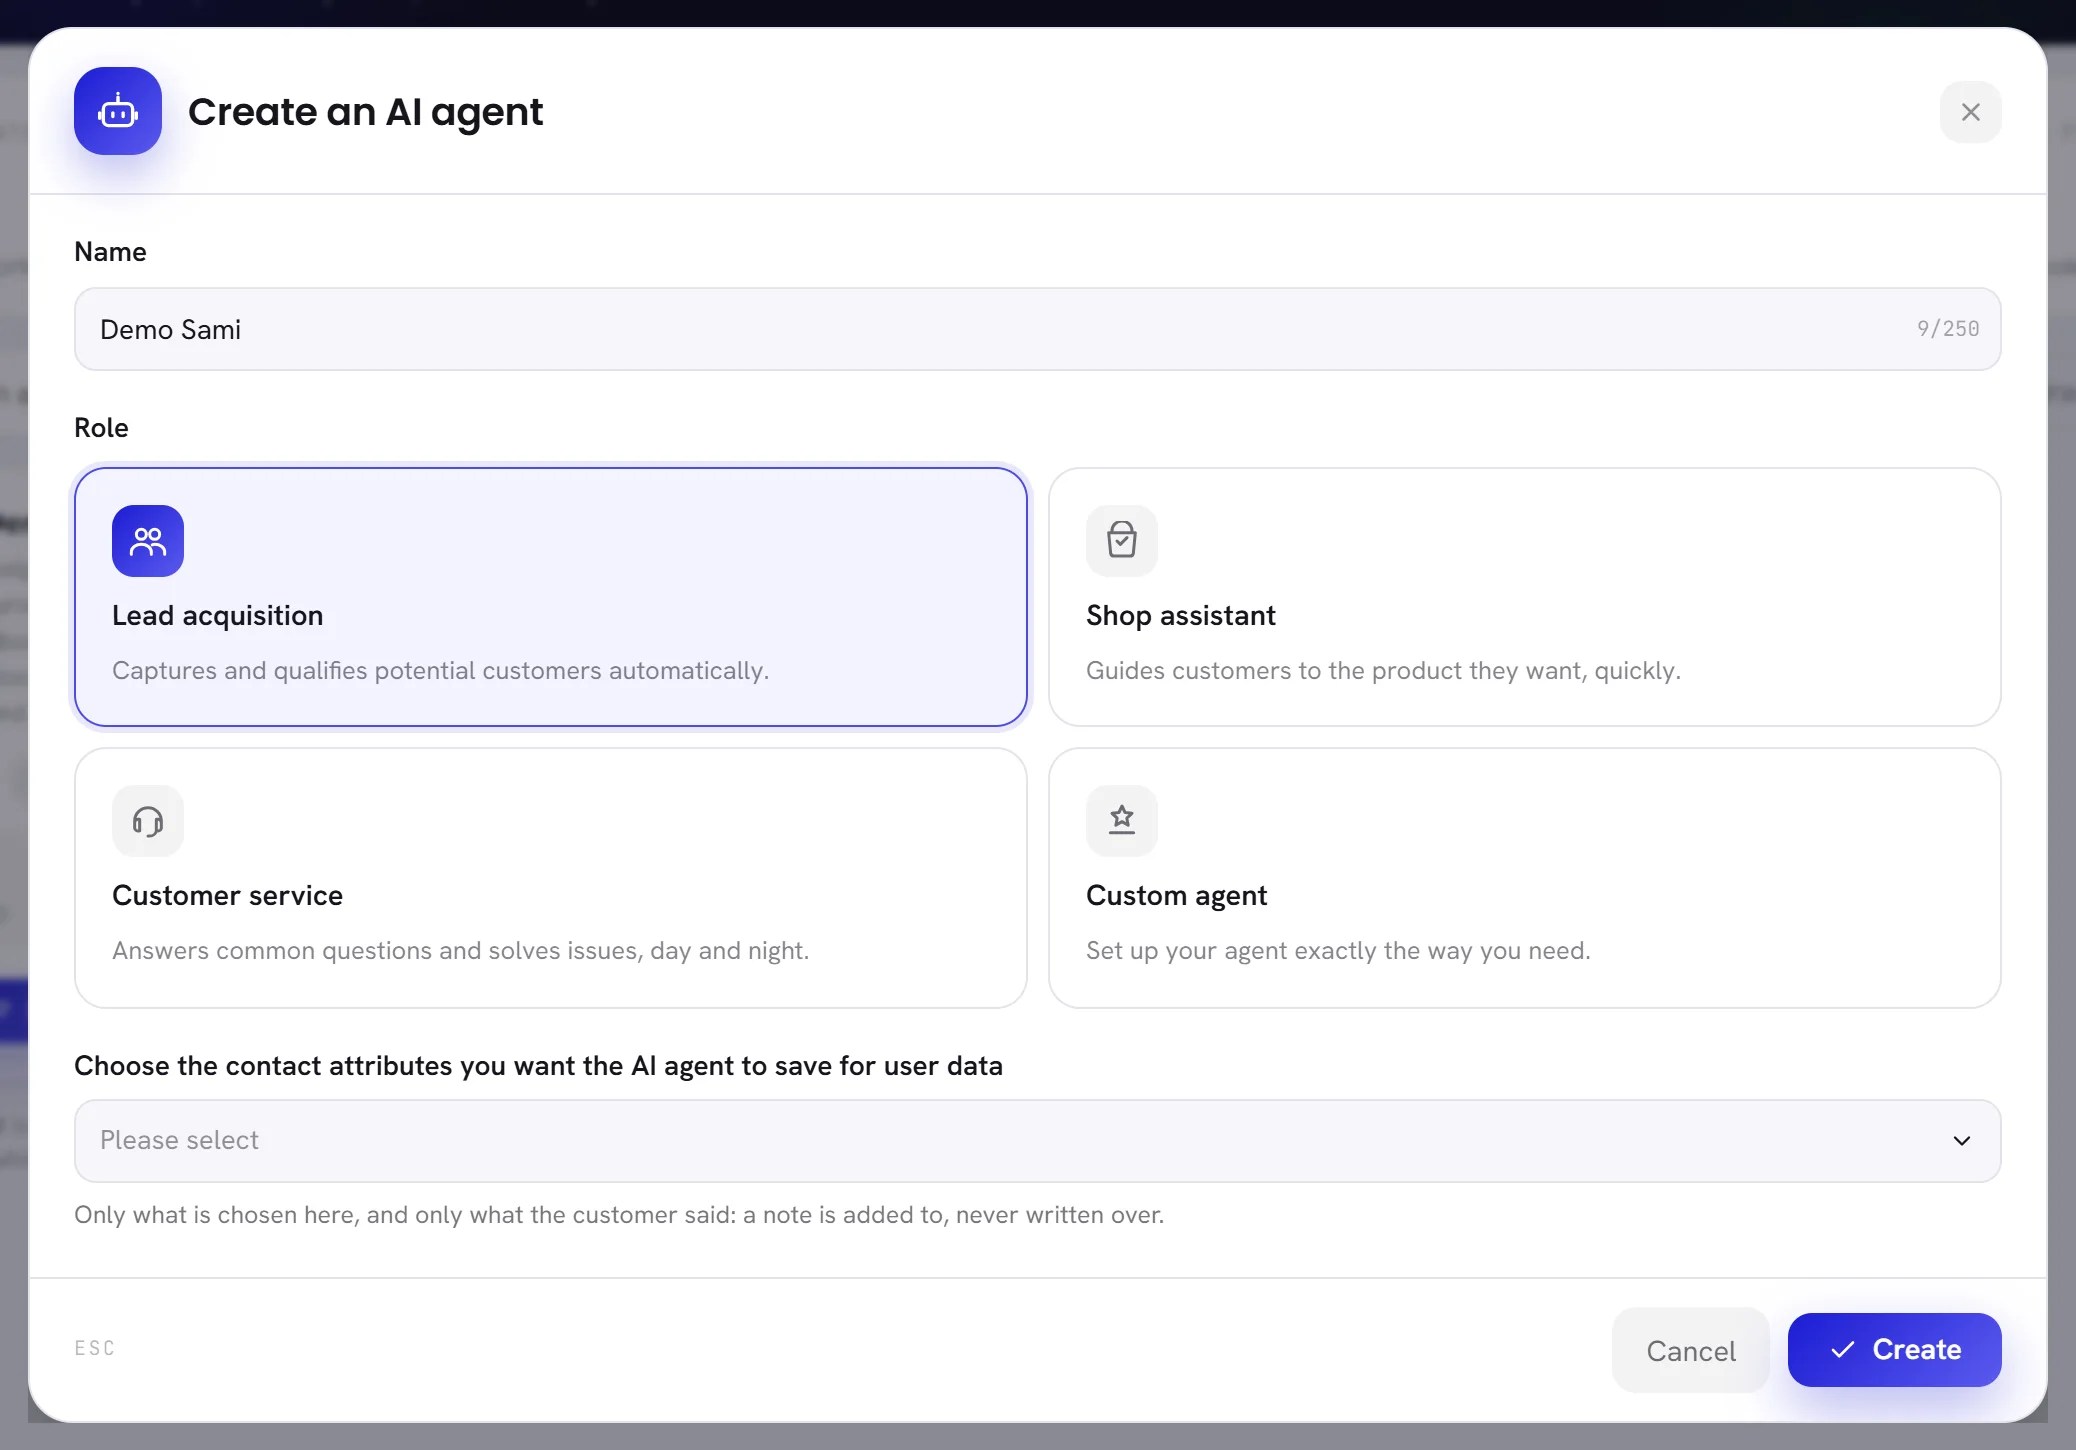
Type a Name.
This is the name the agent goes by. It uses it with customers, and your team sees it on its replies in the inbox. It can be up to 250 characters.
Choose a Role.
The role says what the agent is for. It writes the agent’s first description and instructions, in the language you are using the app in, so the agent you open next already works. You can rewrite both afterwards. The role itself cannot be changed later.
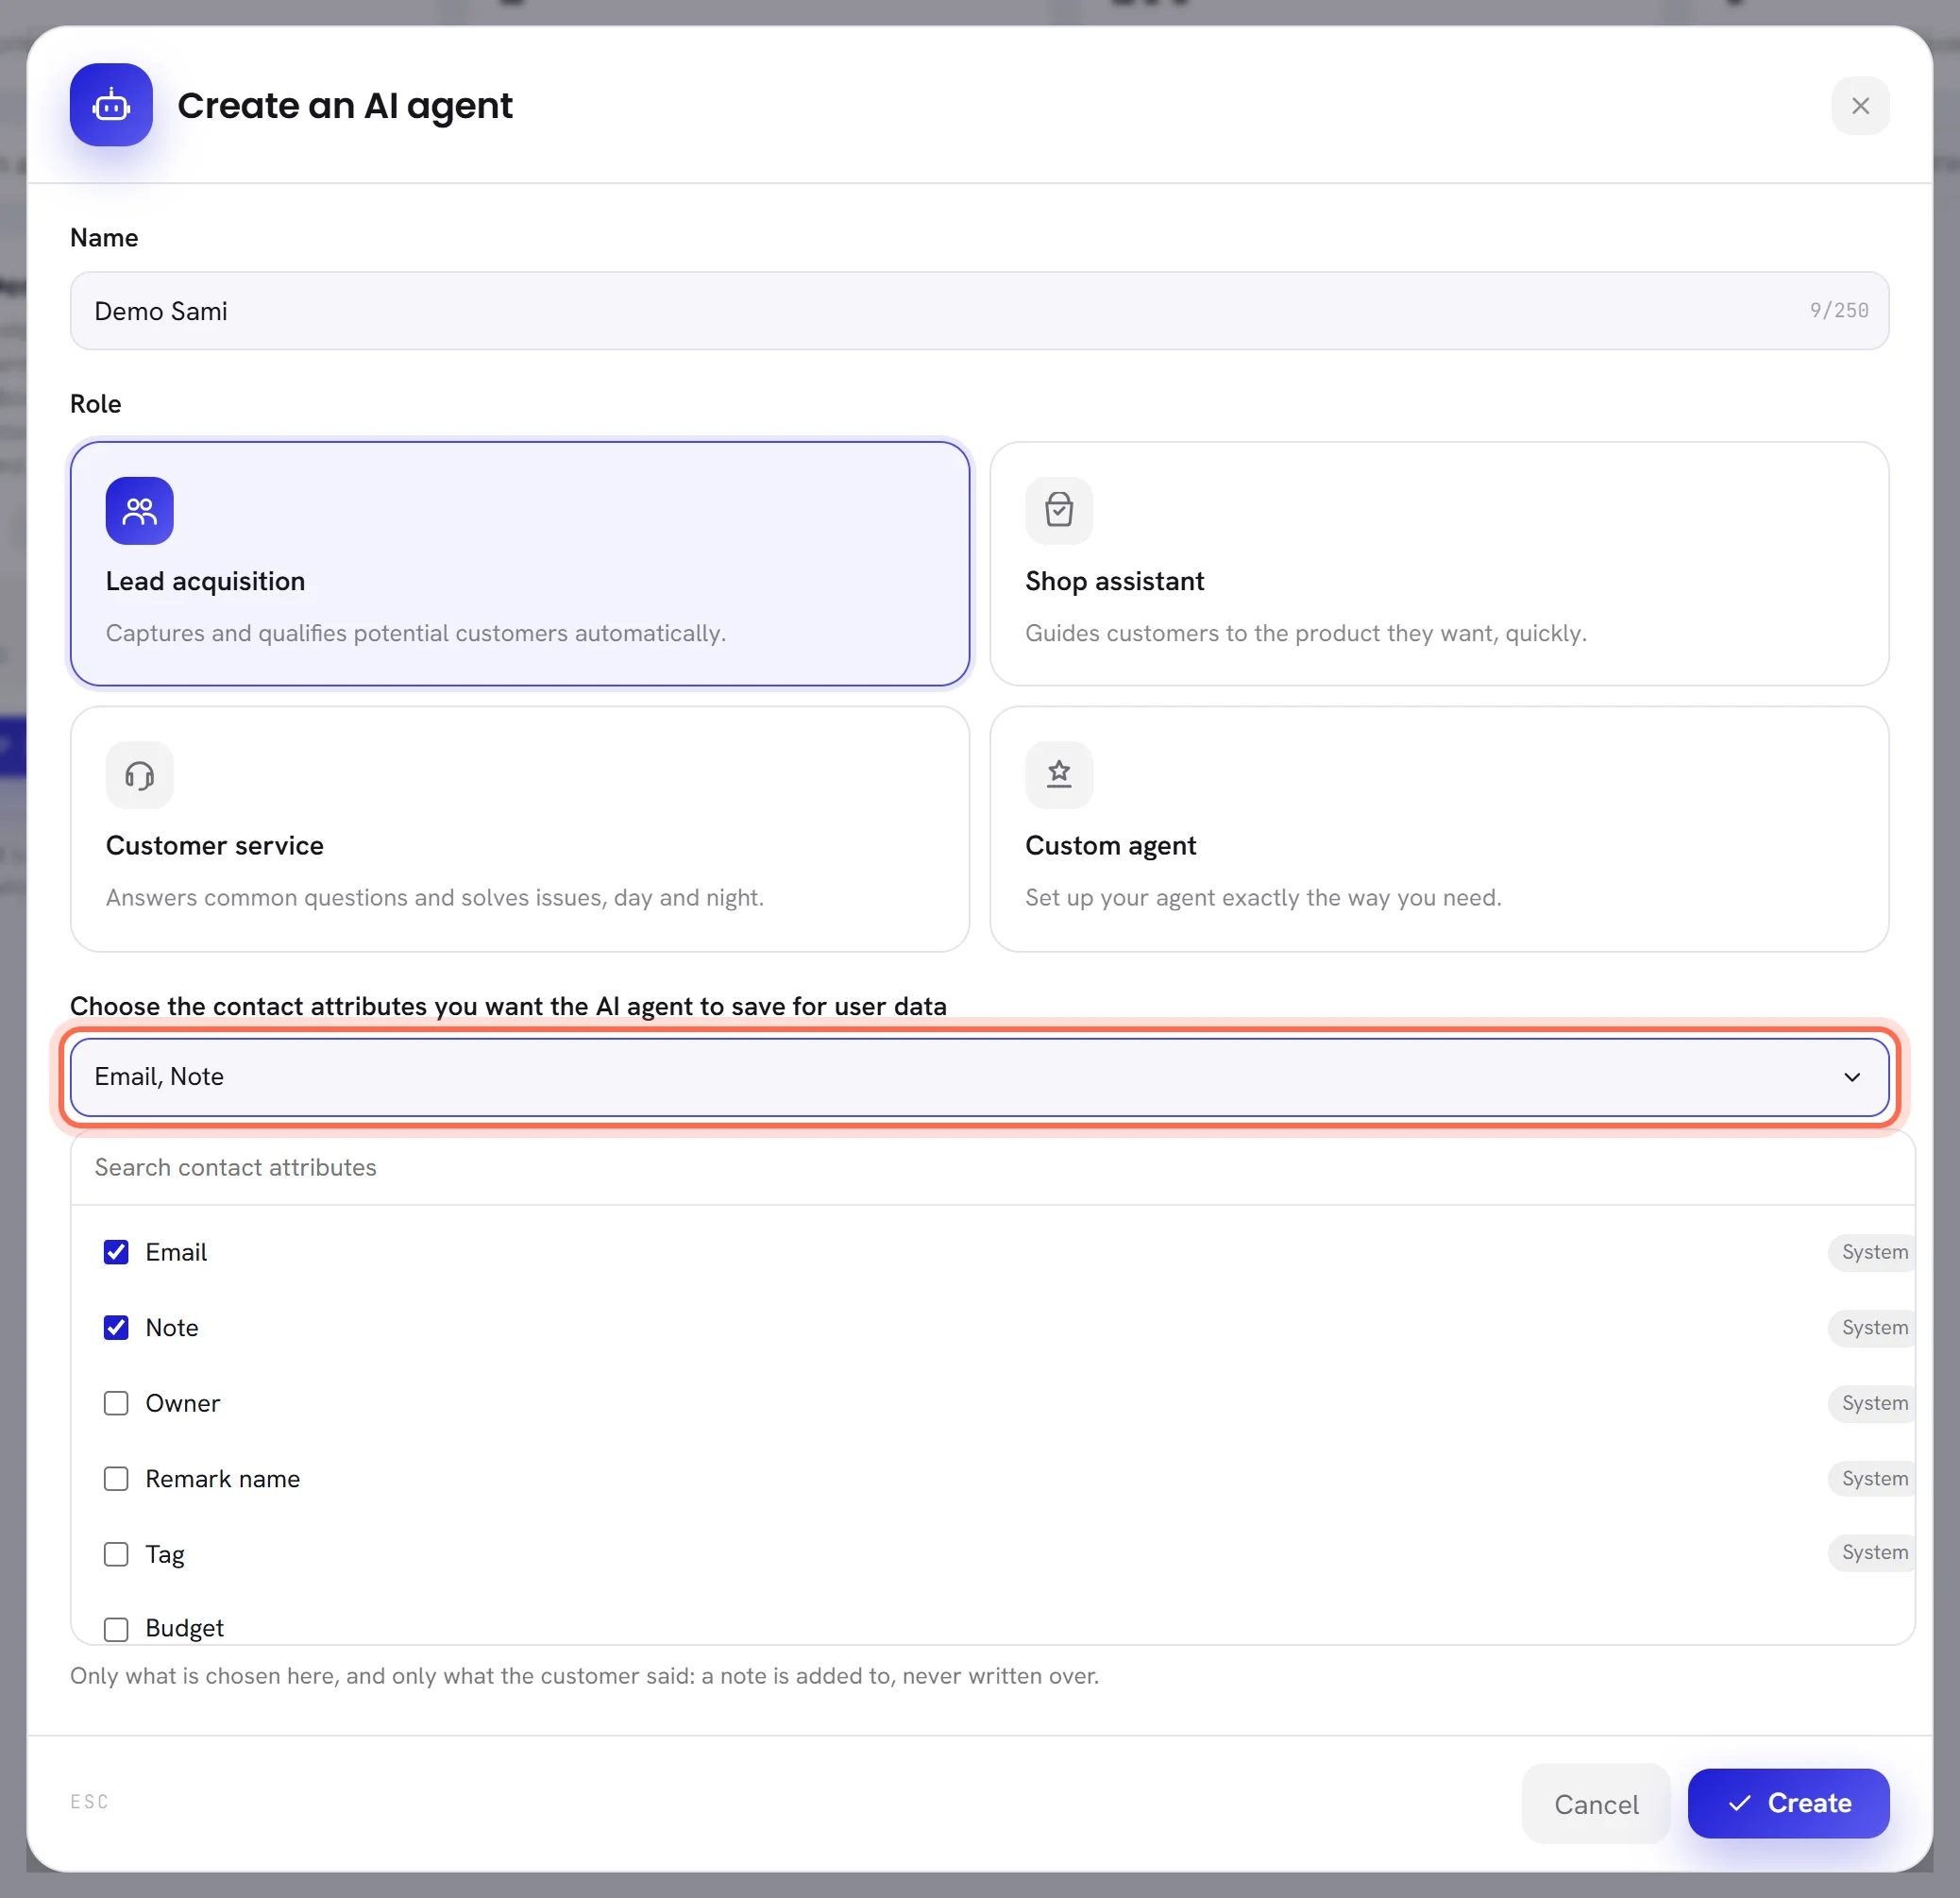
Choose the contact attributes the agent may save.
Open the list under Choose the contact attributes you want the AI agent to save for user data and tick at least one. The first five are the app’s own, marked System: Email, Note, Owner, Remark name and Tag. Your workspace’s own contact fields follow, under their own names. Search contact attributes narrows the list as you type.
The agent saves only what is ticked here, and only what a customer said about themselves. You can change the choice later.
Choose Create.
The agent is made as a draft and its page opens on Profile.
| Role | What it is for | What it starts with |
|---|---|---|
| Lead acquisition | Captures and qualifies potential customers. | Instructions to greet a prospect, ask what they need one question at a time, collect their contact details and offer a call or a visit with a colleague. |
| Shop assistant | Guides customers to the product they want. | Instructions to ask what they are shopping for, suggest a product from the knowledge, answer about stock, delivery, payment and returns, and say how to order. |
| Customer service | Answers common questions and solves issues. | Instructions to understand the issue, answer from the knowledge in short steps, check it is solved, and pass it to a colleague when it is not. |
| Custom agent | An agent you set up your own way. | An empty description and empty instructions. You write both. |
If something is missing, the form stays open and says what: Give the agent a name., Choose what the agent is for. or Choose at least one contact attribute.
What a new agent starts with
- The status Draft. It answers nobody.
- The tone Professional, and English and Arabic as its languages when your plan includes them.
- All four actions switched on with nothing written in them: closing a conversation, handing it to a person, adding tags and saving contact attributes. Left like that, the agent uses its own judgement within its rules.
- The four built-in handover rules switched on: a discount, a legal question, a complaint or refund, and a customer asking for a person all go straight to your team.
- No knowledge and no skills.
- A first version in its history.
Finish setting it up
Read its profile and make it yours.
Check the description and the instructions the role wrote, add your brand’s background, and choose its tone and languages. See Agent profile and instructions.
Give it something to answer from.
Open Knowledge and add your documents, your website, and the questions customers ask most with the answers you want given. An agent with no knowledge can greet a customer, and tells them it does not have the information for everything else. See What your agent knows.
Talk to it in the preview.
Ask it what your customers ask, in the languages they use. Change what is wrong, save, and ask again. See Test your agent.
Put it live
Check that a number is connected.
In the side column of the agent’s page, under the status, the page says how many numbers are connected. If it says No number connected yet., connect one first: see Connect a WhatsApp number.
Choose Deploy the agent.
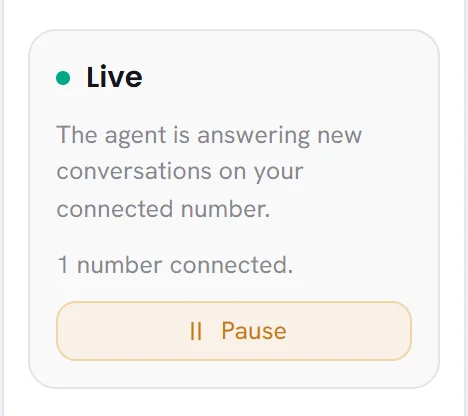
The status turns to Live and the page says The agent is live. From the next message a customer sends, on any of your connected numbers, the agent answers.
Deploying sends customers what is saved at that moment: it publishes the agent’s settings as they are. On the list of agents, the Set live button on a card does the same thing.
- If another agent was live, it is paused: only one answers at a time.
- With no number connected, deploying is refused: Connect a number first — an agent with nowhere to answer is not deployed.
- Conversations a person already holds stay theirs. The agent takes the new messages, not those.
Pause it, or take it off the air
Choose Pause in the side column of the agent’s page, or on its card. The agent stops answering at once. Nothing is lost: its settings, its knowledge and its history stay, and Deploy the agent puts it back.
Questions
Can I change the role later?
No, and you do not need to. The role only writes the first description and instructions. Rewrite those on Profile and the agent does a different job.
Can I make a second agent from the first?
Yes. Choose Duplicate on its card or in the side column of its page. The copy is a draft with the same profile and its own copy of the knowledge. Its skills are not copied.
How many agents can I have?
As many as you need. Only one can be live.